
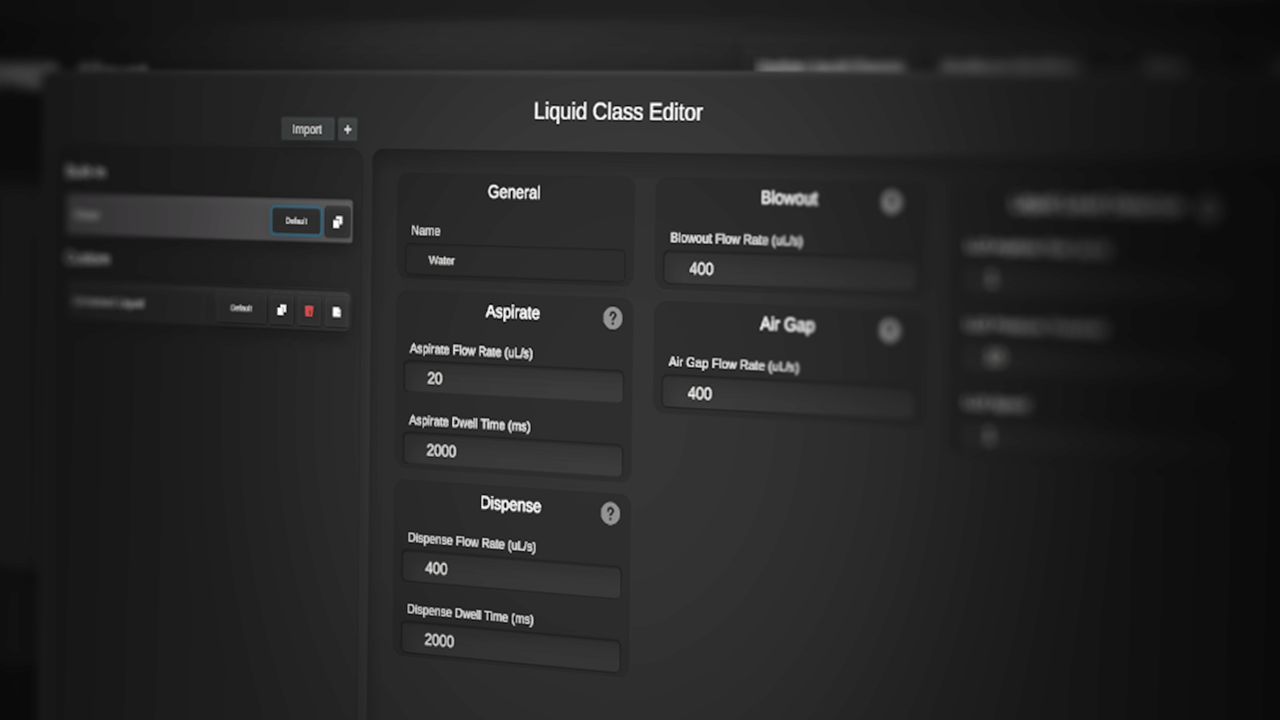
Liquid Class Editor
Liquid Classes are an advanced set of parameters that play a part in how liquid is handled.
This is especially useful in setting up custom parameters for liquids that may be of atypical viscosity, frothiness, density etc.
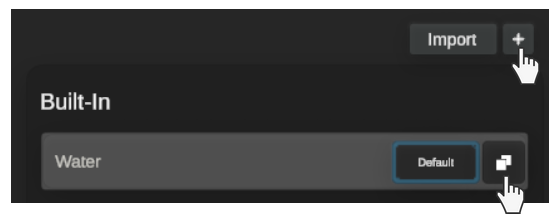
The liquid class editor is accessible from the <flow> settings menu, as well as any area where transfers are handled:

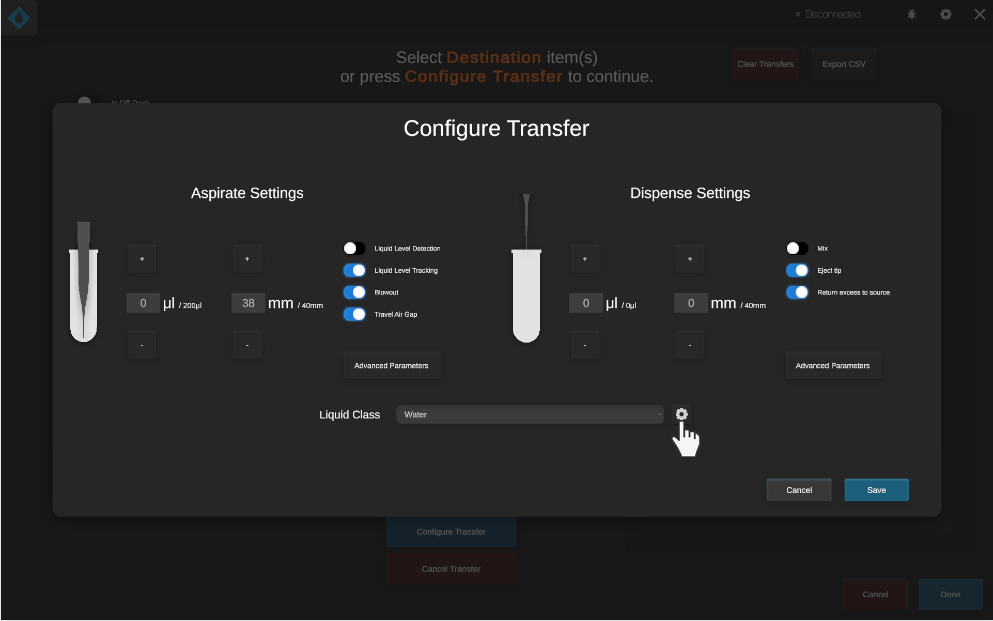
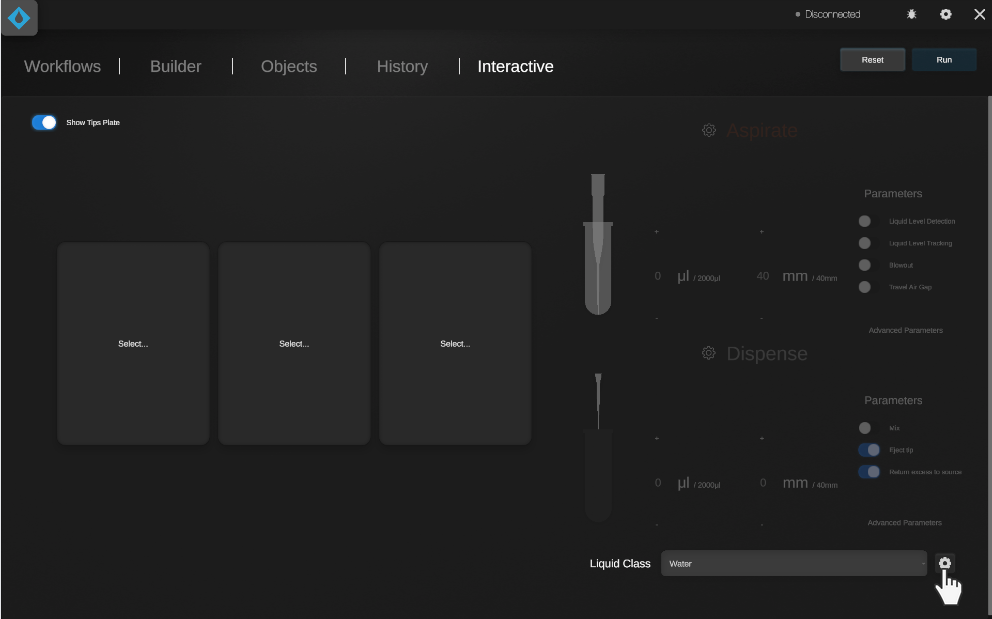
Any of these buttons will open the Liquid Class Editor.
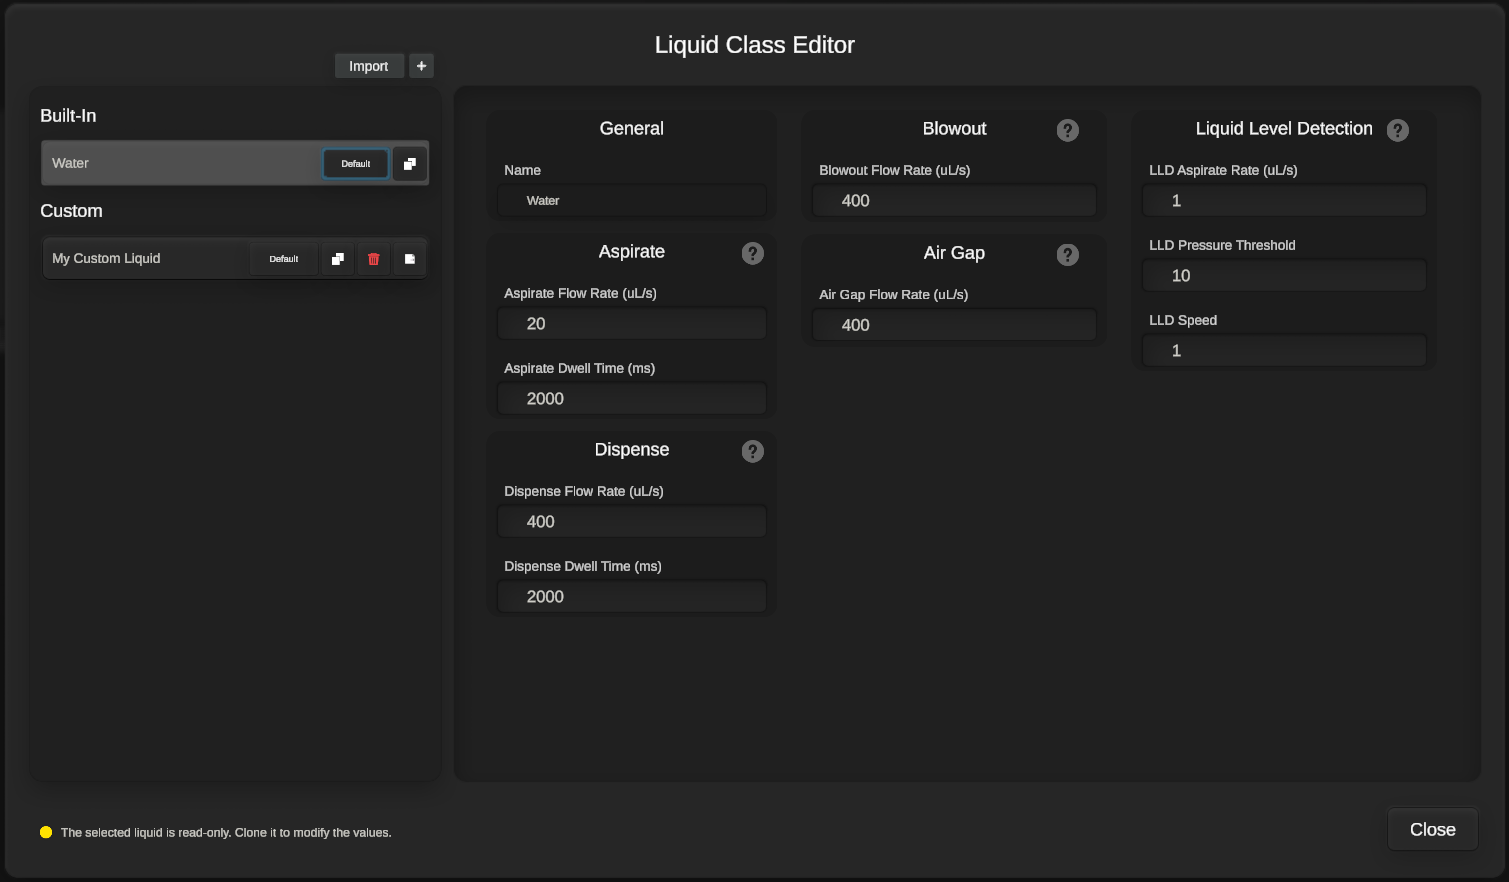
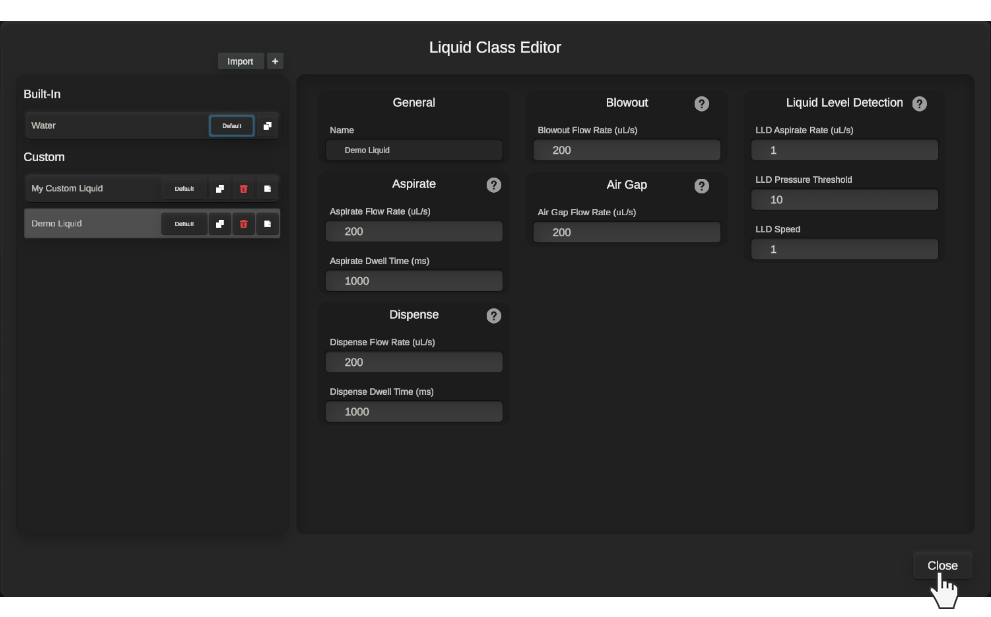
By default, the Liquid Class Editor has a built-in ‘Water' class which mimics the liquid class settings used during Veon Scientific’s internal pipette module calibration process. To get started, we can make a new custom liquid by pressing the “Clone” or “+” buttons.
This will create a new custom liquid with four buttons attached:

Default: Set this as the default liquid class for all future transfers.
Clone: Duplicate this liquid to a new custom liquid class.
Delete: Remove this custom liquid class.
Export: Export this custom liquid class.
From here, we can move on to the liquid class settings.

Each set of parameters is explained by clicking the help buttons.
With my new custom liquid class set up, I can close the editor. Upon doing so, I’ll be prompted to decide whether to update the instances of liquid classes in any workflows in <flow>.
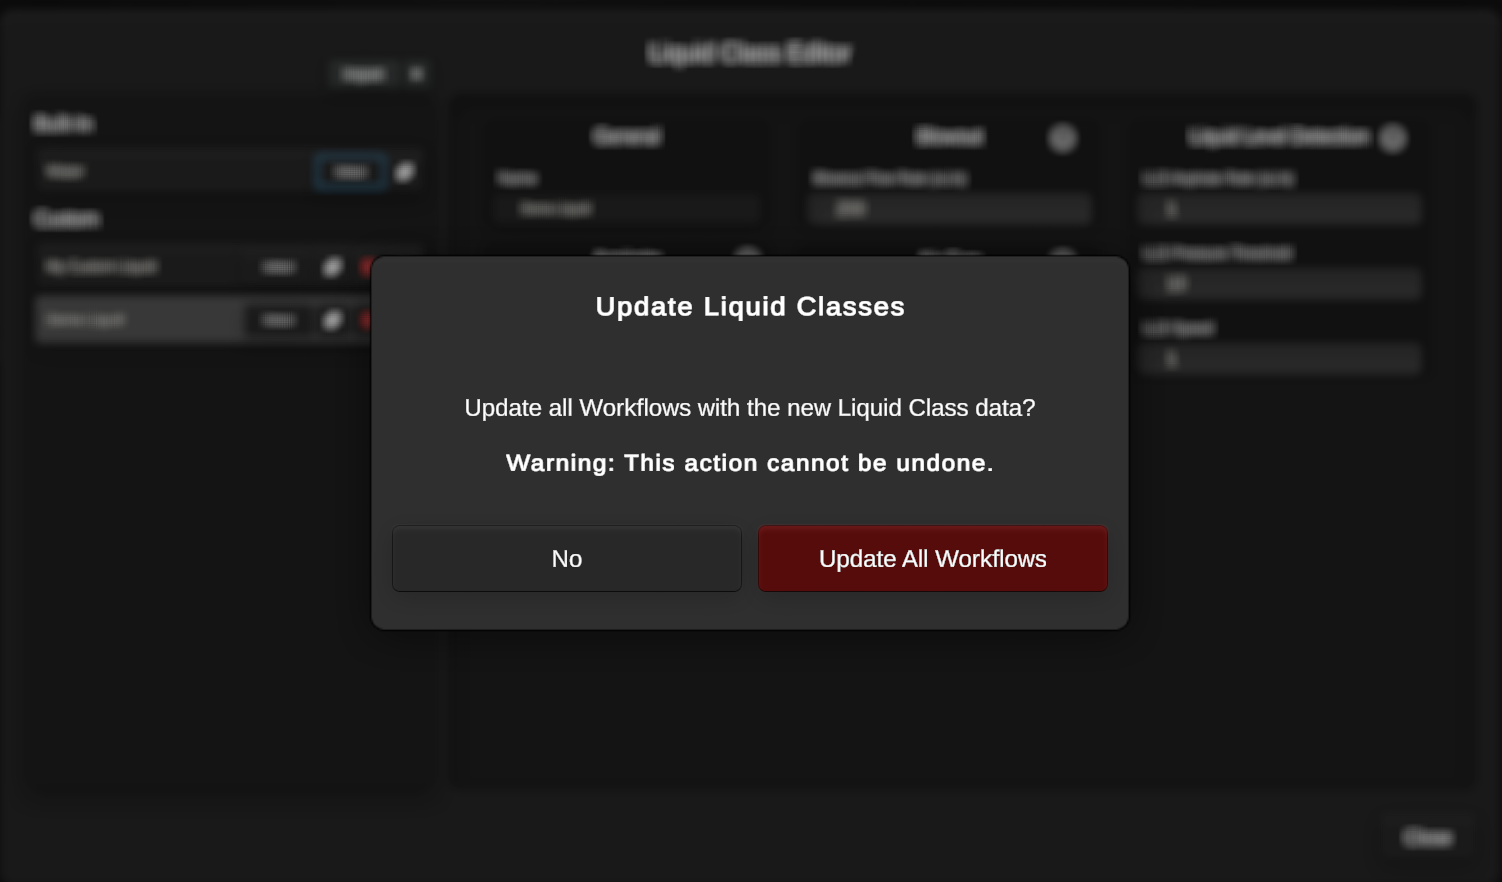
For example, If i was using “My Custom Liquid” in a workflow, then edited that same liquid class in the Liquid Class Editor, I have the option to update the parameters being used by the workflow, or retain the ones that are already being used by that workflow.
Putting a liquid class to use is simple; the user will see an option to switch between liquid classes when adding or editing any transfer.
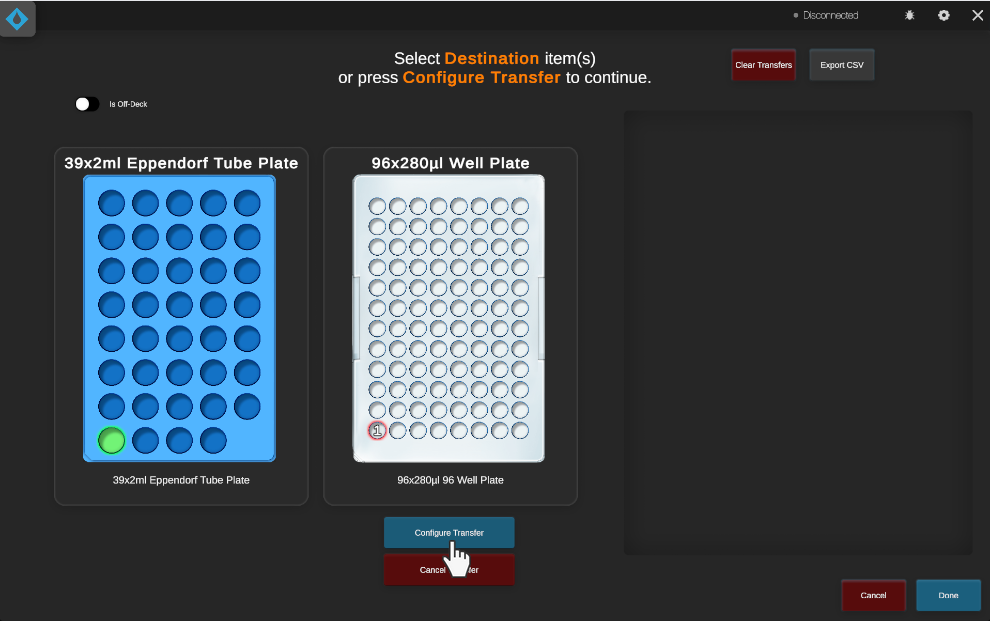


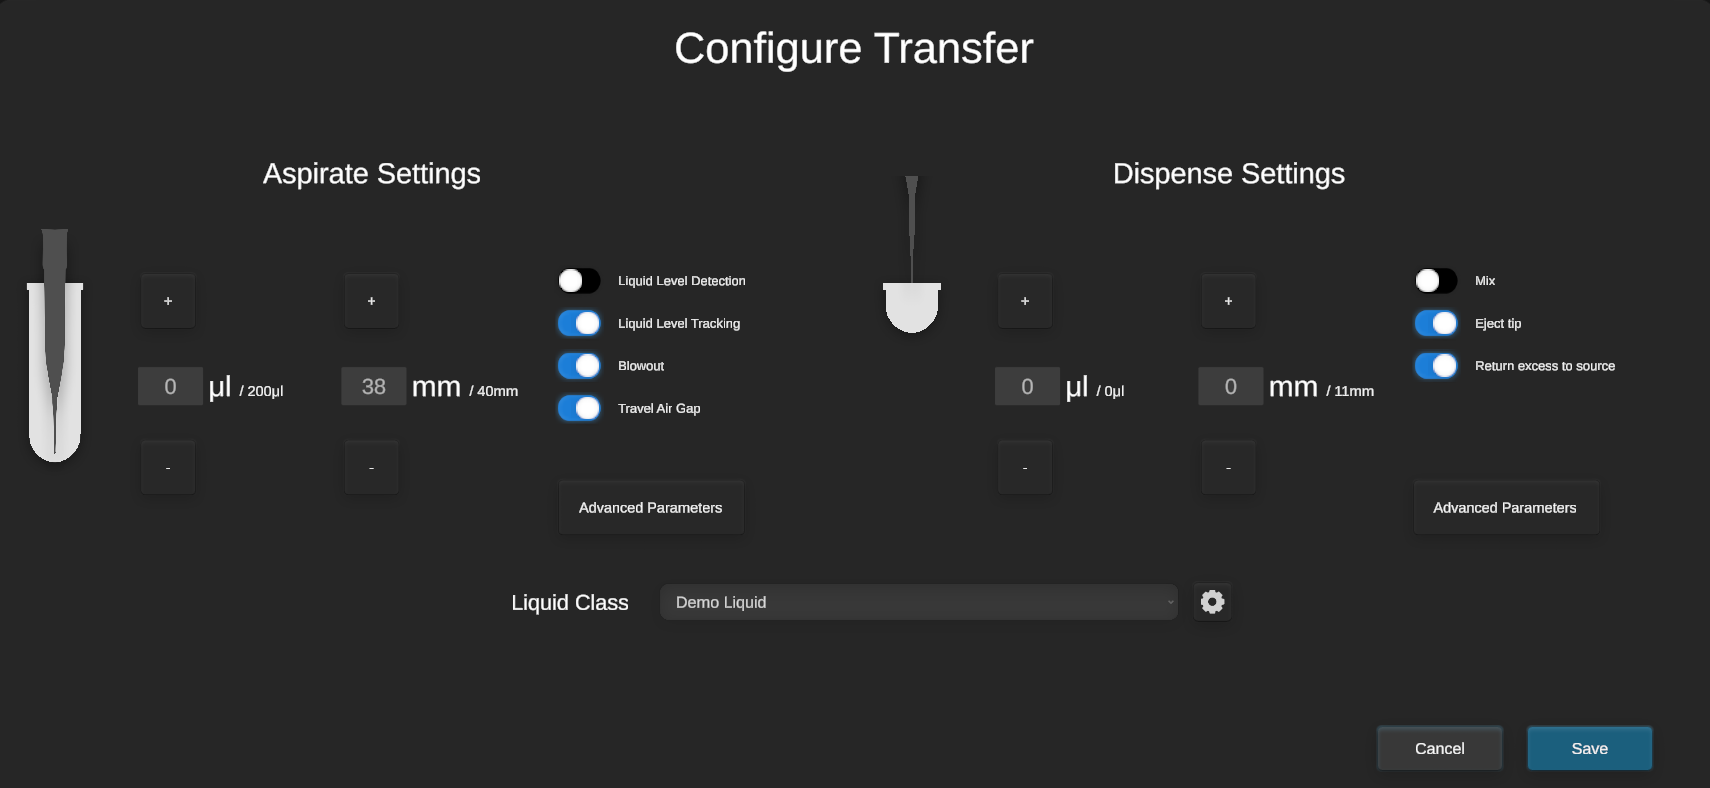
That’s all there is to it - this transfer will now use the custom ‘Demo Liquid’ liquid class!


