Interactive Mode
‘Interactive Mode’ is a tool within <flow> that allows users to prototype transfers.
Before building out a workflow, the user may want to test individual steps within that workflow. The modular nature of <flow> makes this easy!
In this demonstration, we will be distributing 160µL of liquid from a 2mL Eppendorf Tube evenly across eight wells on a 96 Well Plate.
Upon opening <flow>, I connect to my i.prep and navigate to the ‘Interactive’ tab.

This will switch the display to Interactive Mode.
This may seem like a lot of options at first; let’s break it down:

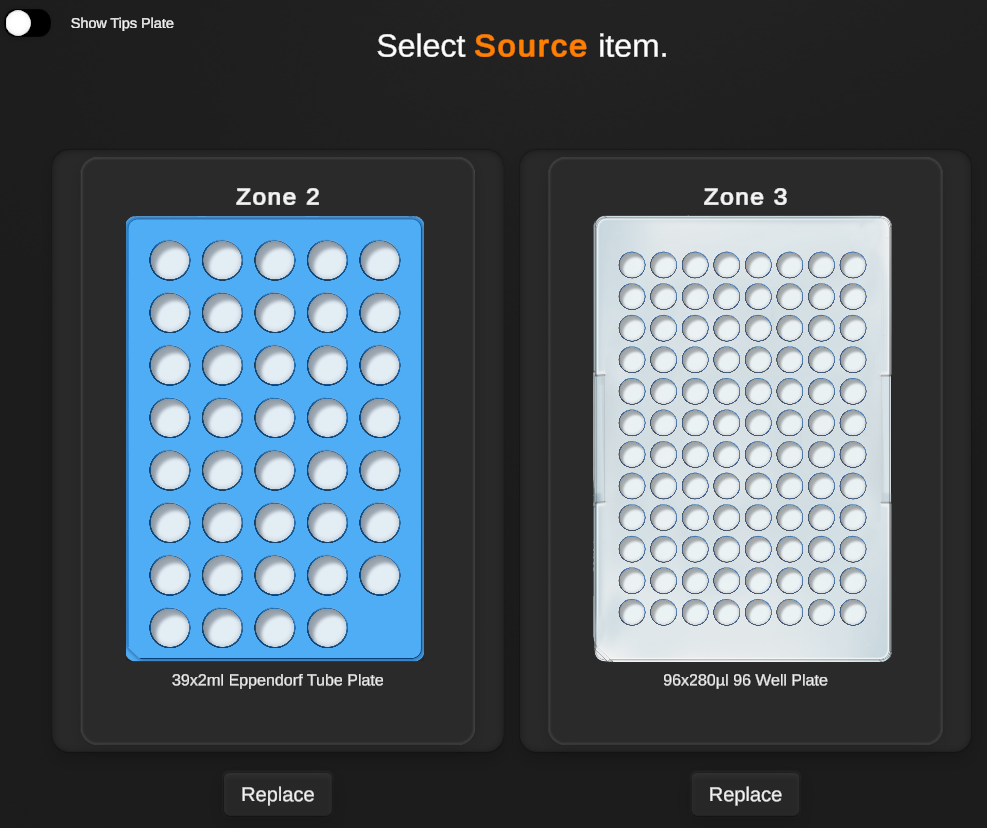
1. Deck Assignment
Here, the user can assign the objects they’ll be using with the i.prep. This typically follows a format of Tips Plate → Source Plate → Destination Plate. Clicking on any of these 3 zones will provide the user with options for assignable objects. For my purposes, I will place a 96x200µL Tip Rack in Zone 1, a 39x2ml Eppendorf Tube Plate in Zone 2, and a 96x280µL Well Plate in Zone 3.

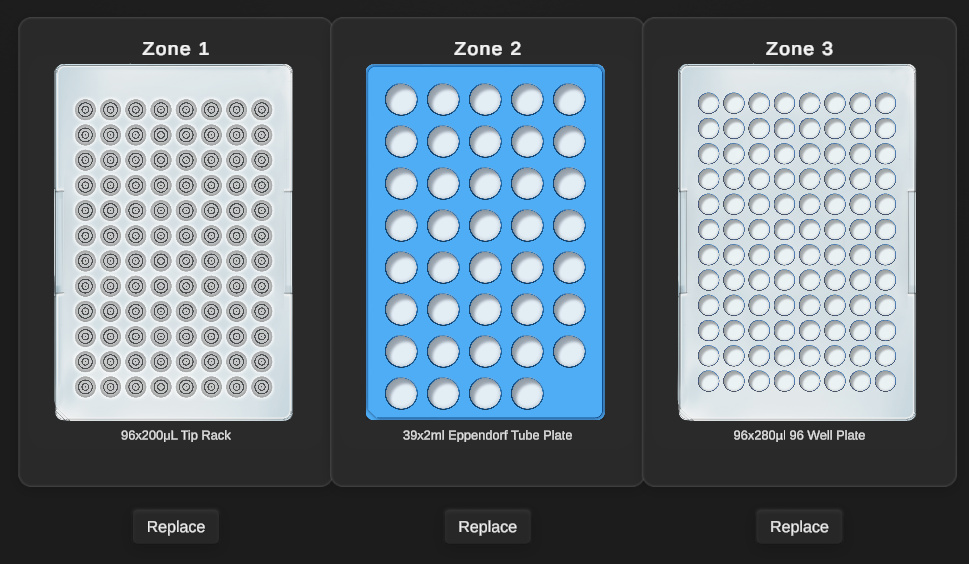
2. Show Tips Toggle
This toggle will show or hide the tips plate. This is toggled OFF automatically, hiding the tip plate, once a tip plate is assigned.
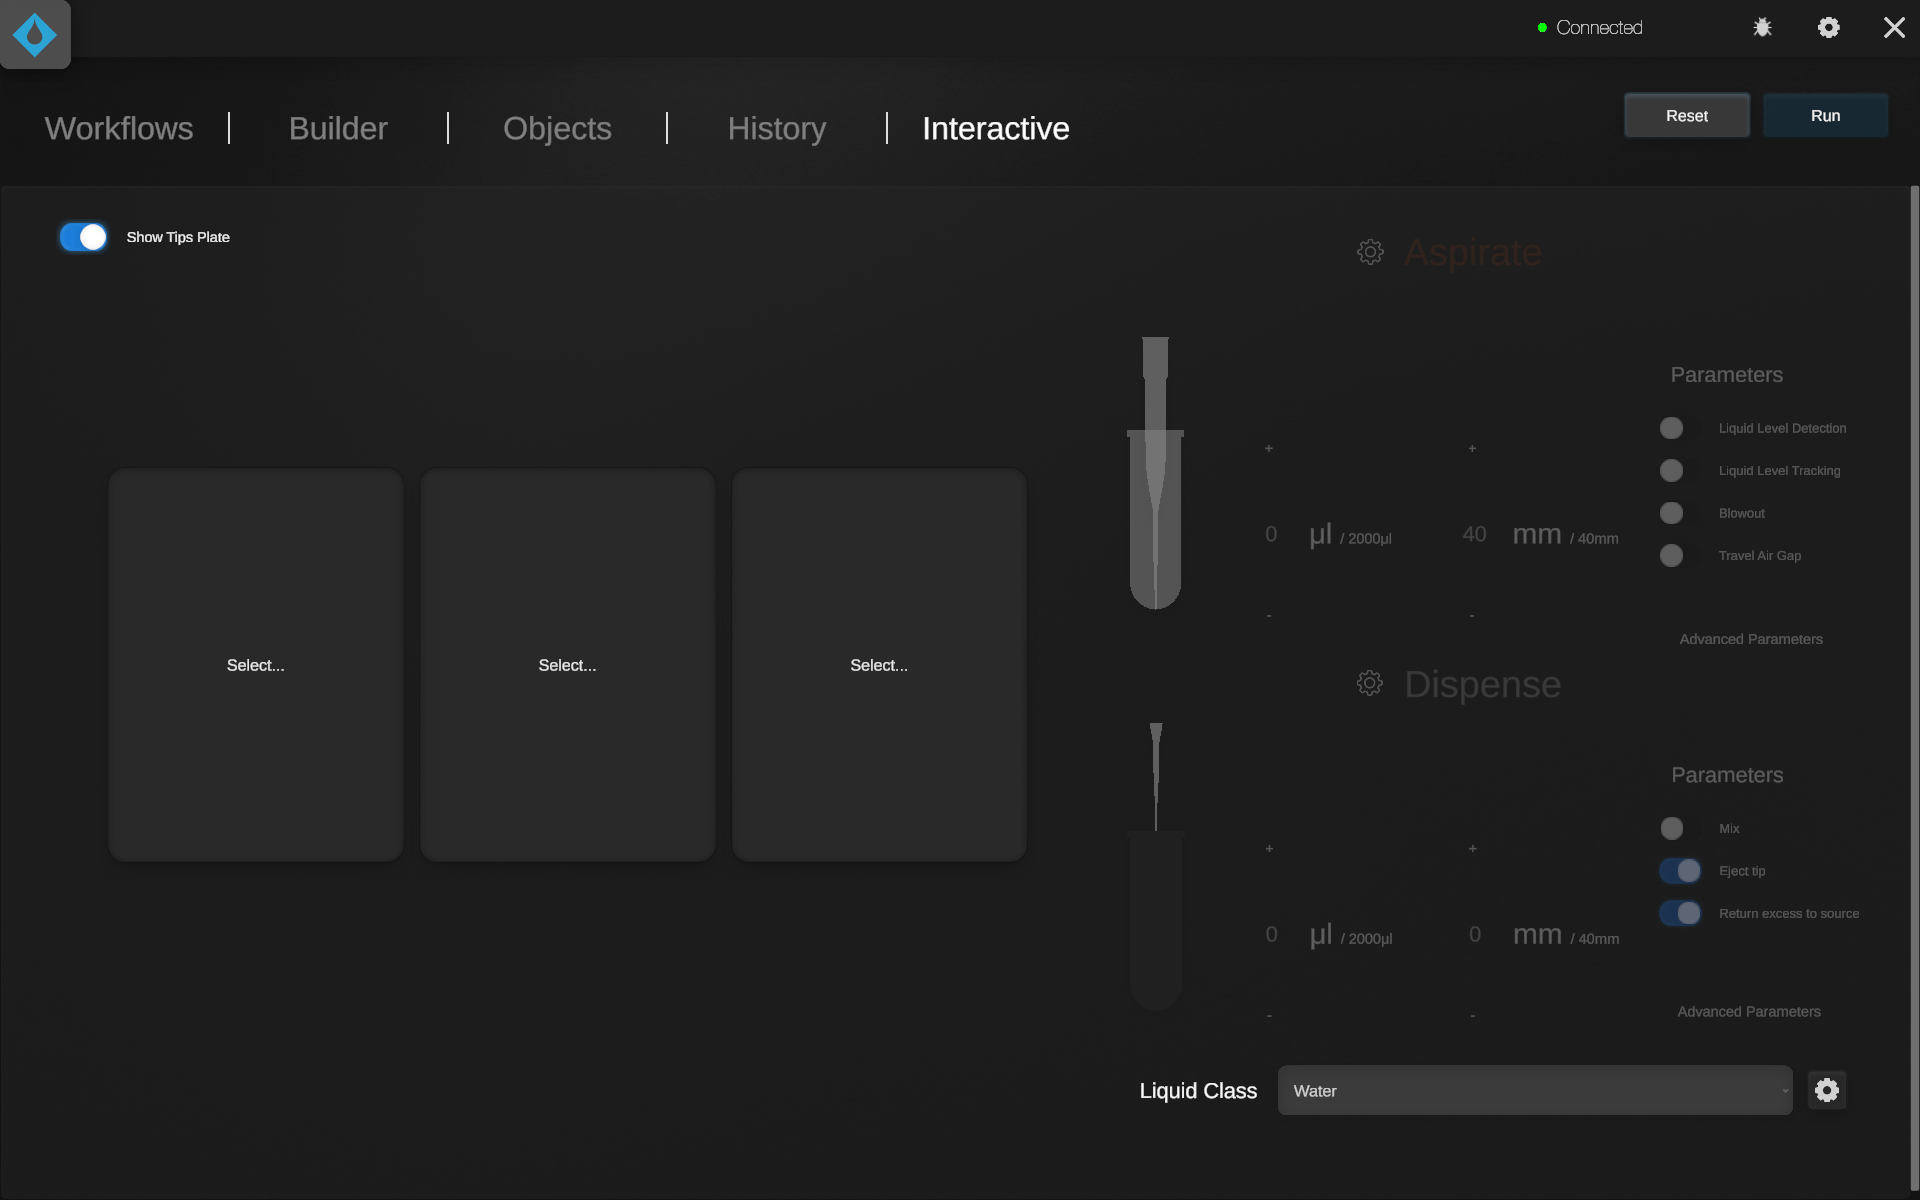
3. Aspirate Configuration
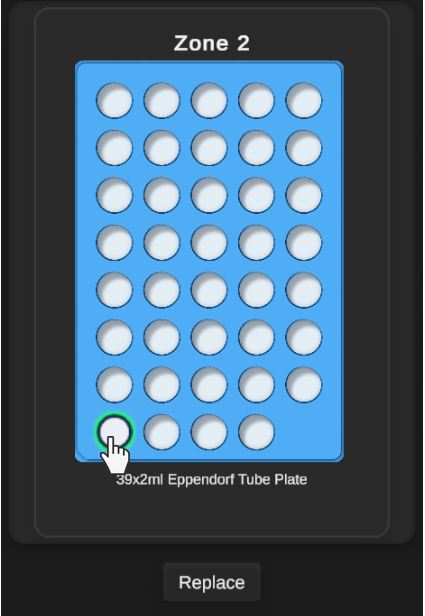
This is where the user will configure the aspirate step. To do this, I’ll select my source item first. In my case, I will select item A1.
With A1 selected, I can configure my aspiration. To do this, I can [1] type a µL value in the “volume” input box, [2] press the + and - buttons, or [3] simply click and drag on the pipette/tube graphic.
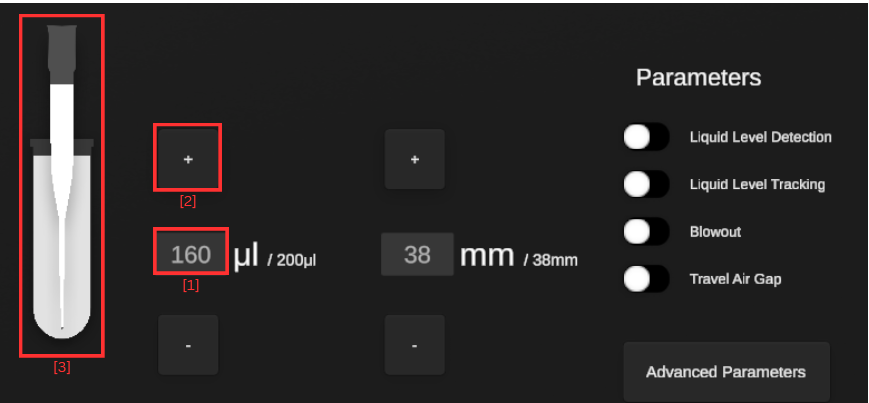
To change my insertion depth, I can use the + and - buttons, or type a value into the “depth” input box. Changes will be reflected on the pipette/tube graphic.
Finally, I can set up basic and advanced parameters for this aspirate step.
4. Dispense Configuration
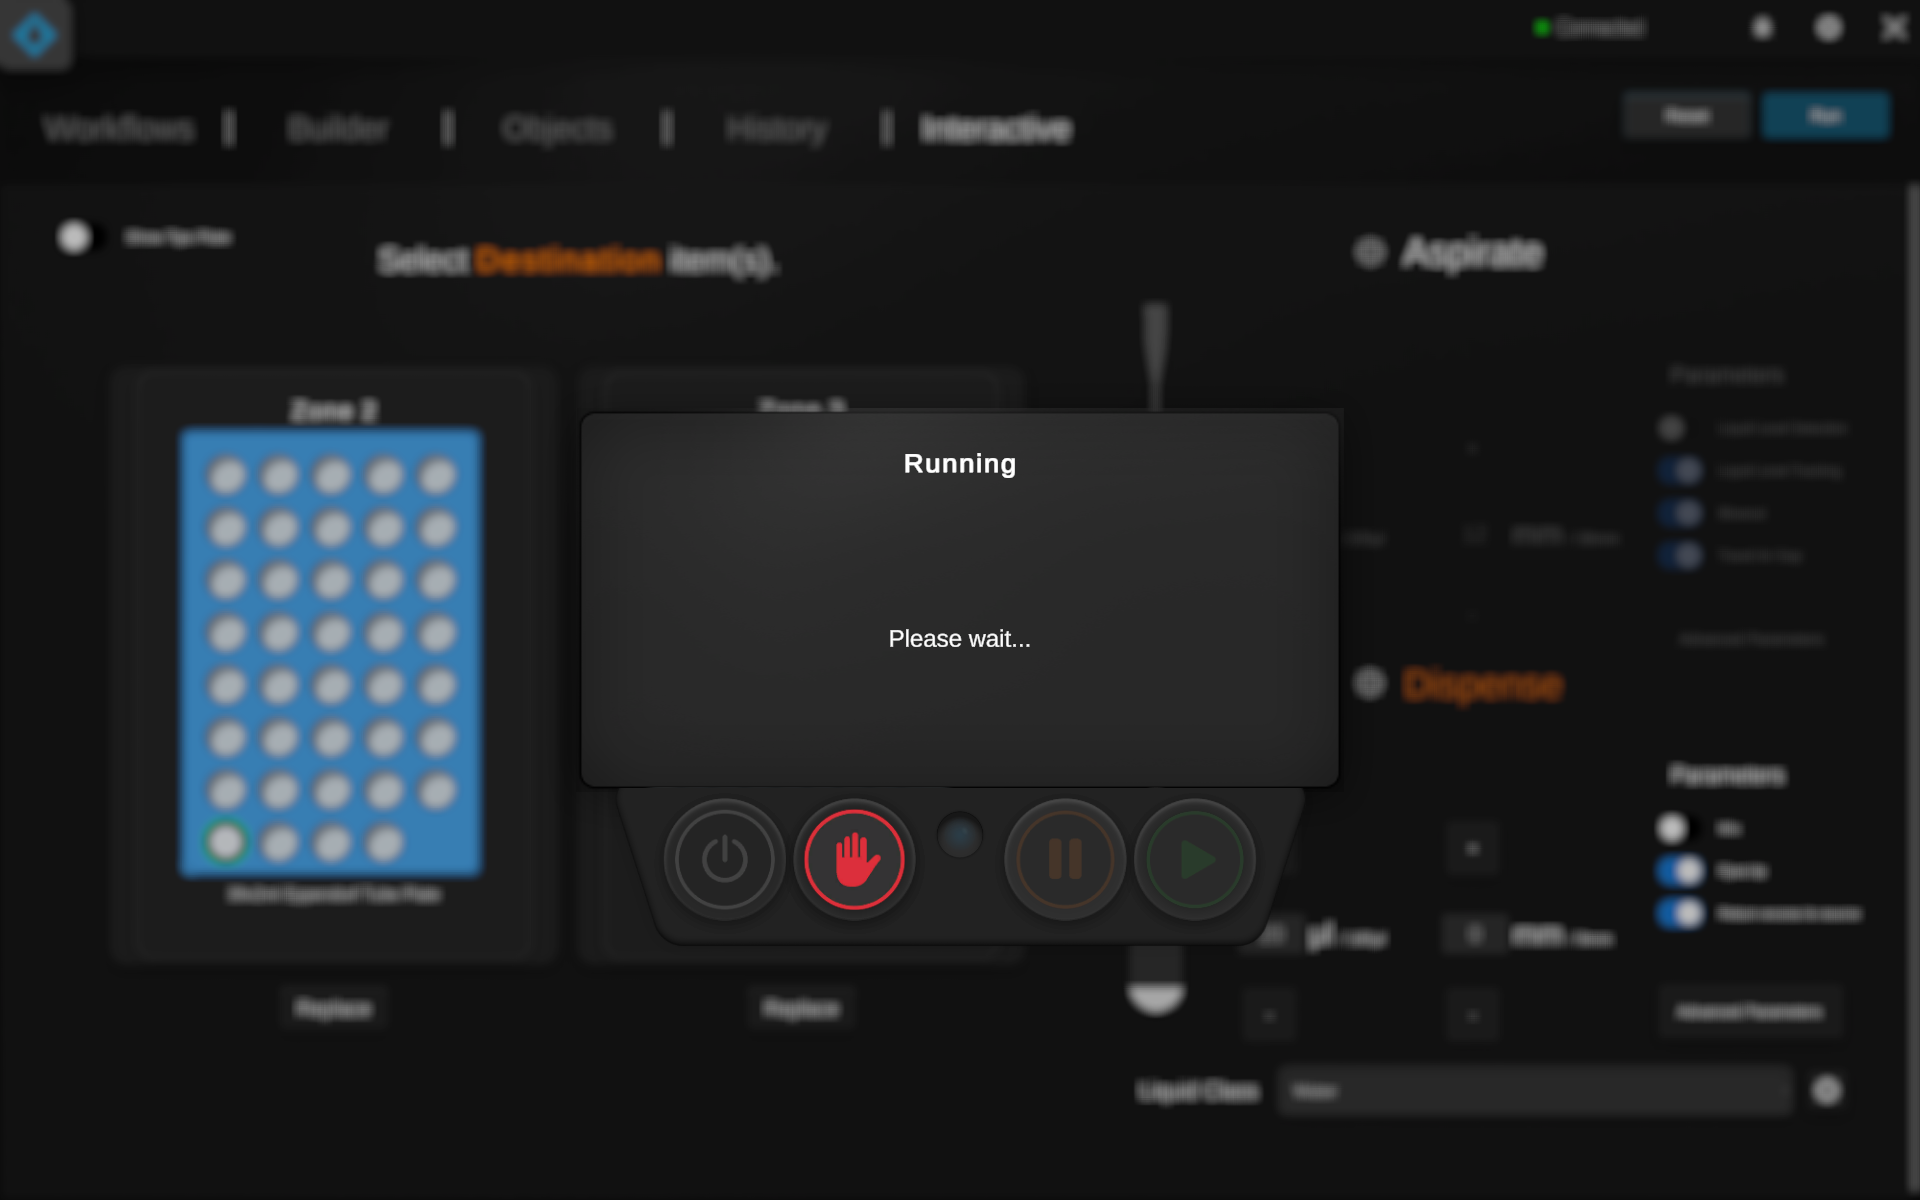
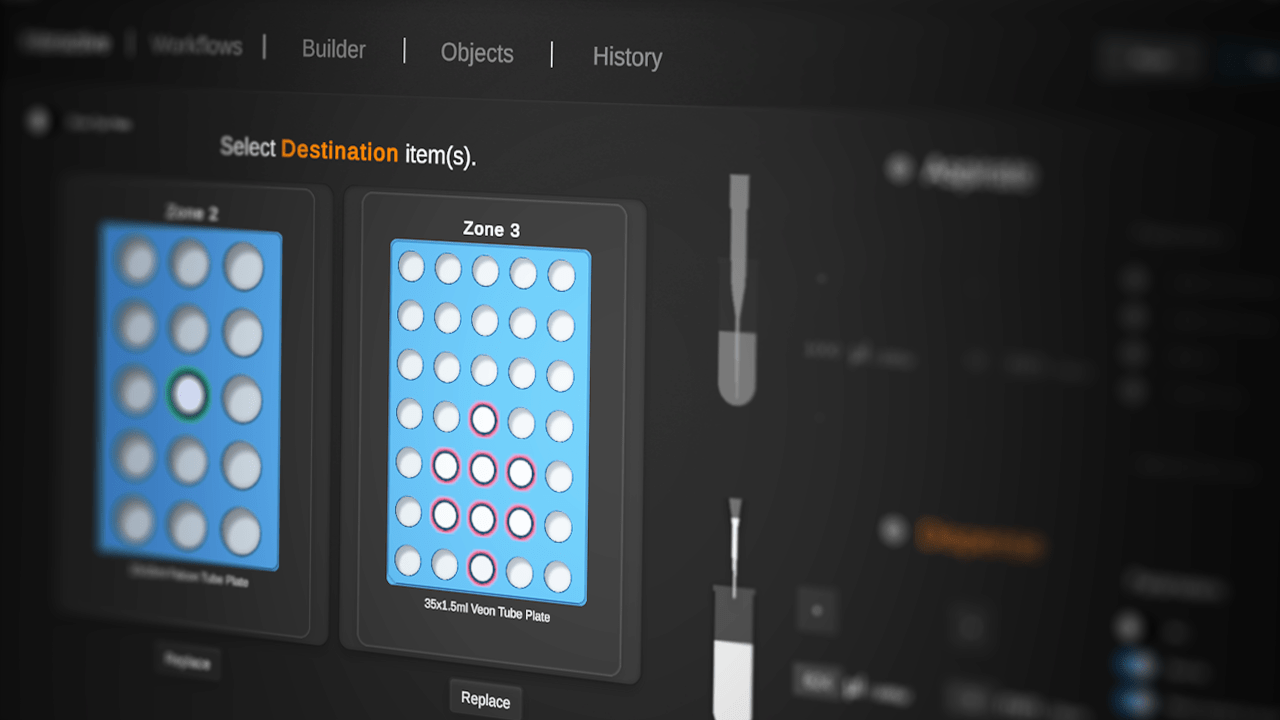
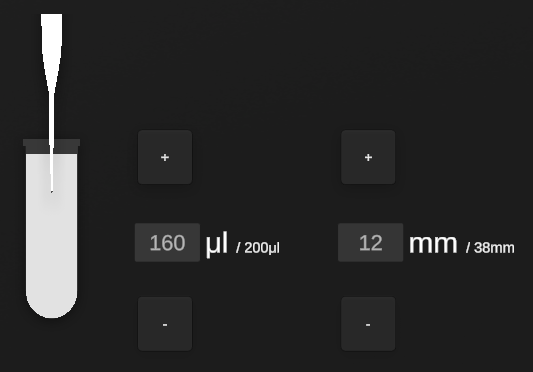
This is almost exactly the same as the aspirate step - except, it handles the dispense! To switch to the dispense configuration, click on the ⚙ button or the “Dispense” title. Note - you can choose multiple destination wells!

With dispense selected, I can now select the wells I want to dispense into and configure my dispense settings.

4. Liquid Classes
Here, I can select the liquid class settings I want to use for this transfer. If unfamiliar, please see our guide on liquid classes.
5. Reset & Run Controls
If I need a fresh start, I can reset Interactive Mode to default by clicking the reset button. Otherwise, Pressing run while connected to the i.prep will run the transfer on the device! The user has the option to abort the transfer during runtime, if they wish.